Delicious Teff Crepes

What are they like? 

- Soft 

- Flavorful

- Great for savory or sweet

For a dessert, enjoy with melted chocolate and whipped coconut cream.

Or, for a savory crepe, sauté some maitake mushrooms with olive oil and bok choy. If you eat meat, you can toss in just a few pieces of smoked salmon and you will have a delicious and memorable meal. 

gluten free dairy free teff crepe recipe
 

Recipe

Makes 6-8 crepes, 5 min prep, 12 min cook time 

1 cup teff flour, 157g
1 1/4 cups unsweetened dairy free milk or water, 275g (or more if a thinner crepe is desired)
2 tbsp olive oil, plus more for cooking
heaping 1/4 tsp salt, or less if preferred
2 eggs 

Optional: you can add spices or herbs of your choice, like paprika or black pepper.

Directions: 

  1. Begin by warming the water so that the olive oil does not solidify when added to the bowl. Then mix all ingredients together in a large bowl for 1 minute or blend in the blender for thirty seconds.

  2. Heat a large skillet over medium heat. I use a twelve inch cast iron which works nicely.* Add one tsp of olive oil (or preferred oil) and then pour in about 1/4 to 1/3 cup of batter (scoop the batter from the bottom of the bowl in case it is not fully amalgamated). Right after you pour the batter into the pan, tilt it around in a quick circular motion to get the crepe batter to spread.

  3. Once the crepe is solid it is cooked through and can be flipped. Cook on the second side briefly, about 30 seconds, before transferring to a plate. Add one tablespoon of water if the batter does not spread to 1/4 inch thickness.

  4. Once cooled to room temperature, the crepes can be kept in the fridge for about 2-3 days in an airtight container.

*If you are not used to cooking crepes, you will have to make a few to get the hang of it. If they break, you are probably trying to flip them too soon. You can oil the pan again after cook a few crepes to help them release. 


Mediterranean Veggie Hash with Creamy Cilantro Yogurt Sauce

What is it like? 

- Colorful

- Full of flavor 

- One of my favorites

IMG_0078 (1).jpg

Recipe

This recipe is excellent served over flatbread. The flatbread recipe follows this recipe and I suggest making it first so that the bread is ready and warm. If you don't want to bake, you can serve this recipe over corn tortillas.

Serves 6, 15 minute prep, 10 min cook time  

1 large zucchini
2 sweet potatoes
2 carrots
1/2 onion
1 red bell pepper
1-2 tbsp olive oil
1/2 tsp paprika
1/8 tsp cumin
1/2 tsp dried thyme or leaves from 3 fresh thyme sprigs
1/2 cup parsly
1/2 tsp salt
2 tsp apple cider vinegar or a neutral vinegar
2 tsp coconut sugar
dairy free whole milk yogurt (unsweetened)

optional: 1/4 cup cilantro

Directions: 

  1. Dice the vegetables and mince the parsley and fresh thyme if using. 
  2. Heat a skillet over medium heat. Add 1 tbsp olive oil along with the onion, carrots, sweet potatoes, spices, thyme, salt and 1/2 of the parsley Turn the heat down to medium low and allow to sauté for about 7 minutes. Then add the diced red pepper and zucchini and cook for about 5 minutes or until all the vegetables are tender. 
  3. Stir in the rest of the parsley, vinegar, coconut sugar, and more salt if needed. 
  4. Mince the cilantro. Serve the vegetables over flatbread with yogurt and cilantro. This dish keeps well in the fridge for 2-3 days. 
 

Italian Flatbread Recipe

This recipe has been adapted from The Essential Gluten Free Baking Guide. It is gum-free.

Serves 4, 10 min prep, 20 min baking

Ingredients:

1 3/4 cup blanched almond flour
1 cup tapioca starch
1 tsp psyllium powder
2 tsp baking powder
1/2 tsp salt (plus sea salt for sprinkling on top) 
1 cup water
1/4 cup olive oil 


Directions: 

  1. Preheat the oven to 400°F. Grease a 12x14 inch cookie sheet or use two smaller sheets. 
  2. Whisk together the first five dry ingredients. 
  3. Heat the water in the microwave until warm to the touch. Then add the olive oil. (If you keep your flours in the fridge you will need to warm the water more so the oil does not solidify.)
  4. Pour the water mixture into the dry ingredients and stir until just combined. You want the mixture to be thick enough that it needs to be spread with the help of a spatula (if it is too thin, it will not rise). If the mixture is too thick, add a little more water. It should be thicker than pancake batter but thin enough that it will pour. 
  5. Bake for about 20 minutes, or until the edges start to brown. 
  6. The bread is best eaten fresh, once it has cooled, but it can be stored in an airtight container in the the fridge or freezer and reheated in the toaster. 

Blueberry Cornbread Muffins

What are they like? 

- Moist

- Full of blueberry

- Perfect with honey

- Sweetened with fruit

gluten free dairy free blueberry cornbread muffins
 

Recipe

12 muffins, or 6 large muffins

Wet
1/4 cup grapeseed oil OR coconut oil, melted
2 large eggs, room temperature
1/2 cup apple sauce OR coconut milk
1/2 cup water, warm
2 tsp vanilla
Dry
1 cup gf flour mix* (see note)
2/3 cup corn flour
1 tbsp sugar
2 tsp baking powder
1 tsp psyllium husk powder or xanthan gum
1/2 tsp salt
1 cup blueberries

Directions:

  1. Preheat oven to 425°F. Line 6 large muffin cups or 12 small muffin cups with liners.

  2. Whisk together the dry ingredients in a medium sized bowl.

  3. In a separate bowl, whisk together the oil, sugar, apple sauce, water and vanilla. (If you’re using coconut oil or coconut milk you’ll need to make sure they are warmed/melted for 30 seconds or so in the microwave before adding the eggs.) Whisk in the eggs.

  4. Place 1 cup of fresh or frozen blueberries in a bowl. If using frozen berries, sprinkle 2 teaspoons of the flour mixture over the top and tap the container to coat the berries (this keeps the color from running as much in the batter).

  5. Add the wet to the dry and stir until some specs of flour remain unincorporated. Then add the berries and stir until the batter is just mixed together.

  6. Spoon equal amounts in to six large muffin cups, filling the tins to the top, and bake until a toothpick inserted comes out with a crumb or two attached, about 18 minutes. (Regular sized muffins will baker more quickly.)

    Serve with honey, butter, or as is. Store in the refrigerator for up to 3 days or freeze.

    *For the gluten free flour blend mix together:

    4 1/2 cups (495g) brown rice flour (It is best to use superfine brown rice flour, like the Authentic Foods brand.)

    1 1/2 cups (219g) potato starch

    3/4 cup (81g) tapioca starch

Chickpea and Cauliflower Coconut Soup

What is it like? 

- Rich

- Smokey

- Coconut-y

gluten free dairy free Chickpea and Cauliflower Coconut Soup recipe

Recipe

1 1/4 cups chickpeas (soaked overnight) or 2 14-oz cans chickpeas
4 oz smoked lean bacon* or smoked ham OR see note for vegan**
2 14-oz cans coconut milk
12 oz fresh green beans, chopped
1 head cauliflower, chopped
water, enough to cover all of the ingredients
2 tsp apple cider vinegar
1 tsp thyme
1/3 cup copped parsley
1/8 tsp each: cumin and coriander
1 tsp paprika, or to taste
2 tbsp soy sauce, or to taste

Directions: 

  1. Gather all of your ingredients. If you are using soaked chickpeas, put them in a sauce pan, cover them with water and bring to a boil. Then immediately simmer on low for about 15 minutes with the lid on.

  2. Meanwhile, heat a large pan over medium heat. Add the bacon and allow it to brown. If the bacon is truly lean, you may need to add a teaspoon of olive oil (or your preferred oil). Flip the bacon and brown the second side, then remove it from the pan and allow it to cool.

  3. While the bacon browns, slice the cauliflower and green beans into bite sized pieces.

  4. After removing the bacon, put all of the other ingredients into the pan, including enough water to cover them and bring the soup to a boil, then immediately turn the burner down to low and allow the soup to simmer.

  5. Slice the bacon (or cut with scissors) and add it to the pot. Simmer until all of the ingredients are tender.

  6. Adjust flavor and serve. (See Note)


NOTES:
This soup only gets better with time. The first night it will be very good, but after resting for two days in the fridge, the flavors meld together and it is a match made in heaven.

* Lean bacon is an excellent source of flavor for soups and it is what people have been using for centuries. If you find a local farm that sells pork, the bacon is likely delicious lean bacon which is more common in Europe than in the U.S. You can use regular lean bacon if your source does not have the smoked option. I usually buy the ends, which are cheaper. 

** For vegan, substitute smoke flavor to taste, and 1/4 cup nutritional yeast.  
 

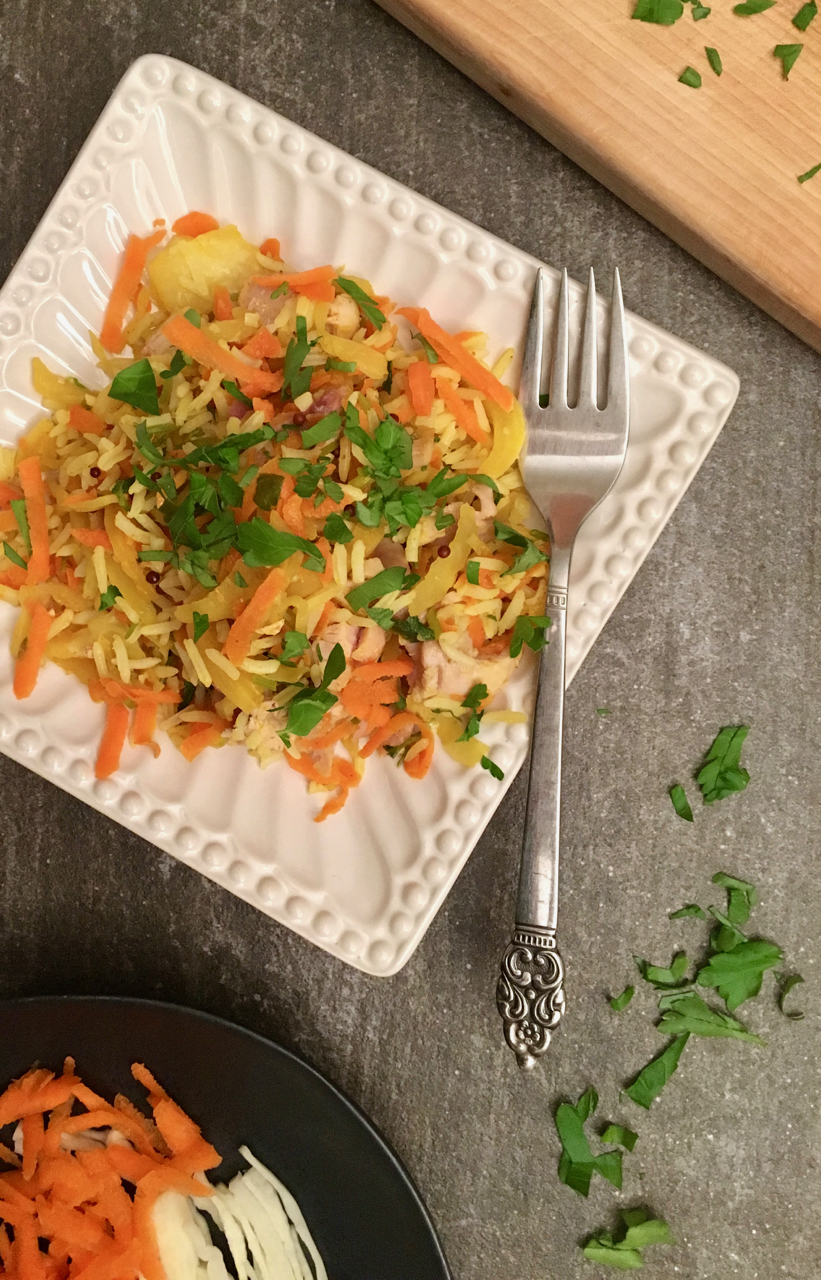
Chicken Fried Rice with Turmeric and Olive Oil

What is it like?

- Tastes like the greasy good stuff, but packed with veggies, healthy fat, and protein!

IMG_2741.jpg

This recipe makes a boatload, and it's great for leftovers. It is not traditional fried rice, but it is a match made in heaven. 


Recipe

Serves 8, prep 25 minutes

1 lb organic chicken OR cooked great northern beans for vegan* 
1 cup organic basmati rice
2 cups green cabbage, sliced very thinly
1-2 cups carrots, grated
2 stalks celery, diced
1/2-3/4 cup parsley, chopped
olive oil, as needed (about 1/4 cup)
1 tsp mustard seeds*
1 tsp turmeric*
2 tsp apple cider vinegar OR white vinegar*
1 tsp organic sugar
salt, to taste 

Directions: 

  1. Preheat the oven to 350° degrees. Sprinkle the chicken with salt and then lay in a single layer in a bake safe dish and bake for 20 minutes or until completely cooked (all juices are clear). 
  2. Slice the cabbage thinly. Heat 2 tsp olive oil in a large pan over medium heat. Add the mustard seeds and turmeric, followed by the cabbage and about 1/4 tsp salt. Sauté for about 10 minutes, stirring occasionally. 
  3. To make the rice pilaf, heat 2 tsp olive oil in a 2 quart pan over medium-high heat. Place rice in pan and stir every 20 seconds for about 1 minute. Then add 2 cups water and simmer for 10 minutes with the lid on.
  4. While the rice cooks, grate the carrots and then add them to the cabbage along with the rest of the ingredients. You can also add another tbsp of olive oil, which adds flavor and richness to the dish. When the chicken (or beans) is cool enough to touch, chop it into bite sized pieces and add it to the dish. Adjust the seasoning by adding more salt, olive oil, and turmeric to taste. 

*Generally, beans are easiest to digest after soaking in water overnight. Then, drain the beans, cover with one inch of water or broth, and simmer on low until tender.
*Do not include vinegar if you have acid reflux. Also, do not include mustard seeds or turmeric if they are not tolerated.